Share
Setting up a Jethro server on an Amazon AWS Instance
This post walks you through the steps of setting up a Jethro server on an Amazon AWS instance.
It assumes that the you have a running instance that is already configured to be used as a Jethro server.
If you haven't created an instance yet, go to "Set up an Amazon AWS Instance for Jethro" in order to create and run an instance and then go to "Configure an AWS Instance for a Jethro server" in order to configure the instance.
Set up Hadoop to be used for Jethro storage
The following will take through the steps required to setup Hadoop for storage. It assumes that you have a Hadoop cluster running with enough space for your data and that the Hadoop nodes can be accessed from the Jethro server instance.
If you intend to use local disk for storage, skip this section.
- Configure Hadoop client by copying the files /etc/hadoop/conf/core-site.xml and /etc/hadoop/conf/hdfs-site.xml from any hadoop datanode to the same location on the Jethro server.
Verify that you can connect to haddop by running the command:hadoop fs -ls /
- As Hadoop hdfs user, create a root HDFS directory for Jethro files, owned by jethro Hadoop user. In this document we assume it is /user/jethro/instances:
hadoop fs -mkdir /user/jethro

hadoop fs -mkdir /user/jethro/instances

hadoop fs -chmod -R 740    /user/jethro

hadoop fs -chown -R jethro /user/Jethro
Set up local disk to be used for Jethro storage
The following will take through the steps required to setup local disk for storage.
- Create an EBS volume for the data and attach it to the instance.
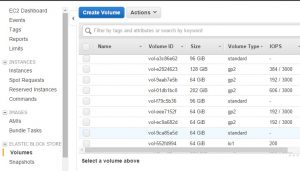
If you created an EBS volume for the data when creating the instance, you should skip to step 8. - Go to the EC2 console and choose “ELASTIC BLOCK STORES“ -> “Volumes” from the menu on the left.
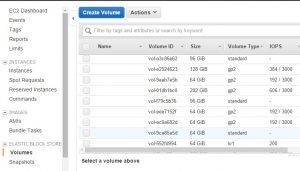
- Click “Create Volume” to create a new volume.
- Specify the size in GB and the availability zone, which should be the same as the one specified for the instance.
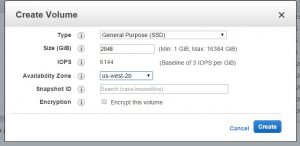
- Click “Create” to create the volume.
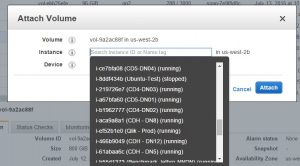
- Choose the newly created volume and from the “Actions” menu, click on “Attach Volume”

- Select the instance, and click “Attach”.
- Next, you need to mount the EBS volume.If you used the mountVolumes.sh script to mount the volumes automatically, you can skip the rest of this section.When running “lsblk” you will see the EBS volume. In this case it is called “xvdd” and it is of 1TB in volume
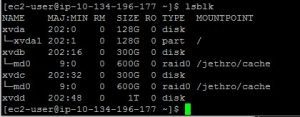
Run the command:sudo file -s /dev/xvdd

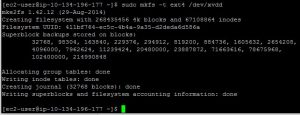
If you see an output similar to the above, it means that you need to create a file system on the volume. If the output is different, skip the next step. - Next we will create a file system.Run the following command:
sudo mkfs -t ext4 /dev/xvdd
- Mount the file system to the directory /Jethro/instances by running the following:
sudo mount /dev/xvdd /Jethro/instances
Next, run the command "df –h" to see the mounted device. In this example you have 1TB mounted on /Jethro/instances

- You can add the following line to /etc/fstab in order for the volume to be automatically mounted after reboot:
/dev/xvdd /jethro/instances auto noatime 0 0
Create a Jethro instance
The following takes you through the steps required to create a Jethro instance.
- change to user “Jethro” by running:
su – jethro
use “Jethro” as password.
- Use the JethroAdmin tool to create a Jethro instance.If you use hadoop for storage, use the following command:
JethroAdmin create-instance demo -storage-path=/user/jethro/instances -cache-path=/jethro/cache -cache-size=500G
This example uses “demo” as the instance name, but you can change it with a different name if you wish.Specify the cache size according to the size you have in the volume you mounted for cache.

If you use local disk for storage, specify the following command:JethroAdmin create-instance demo -storage-path=/jethro/instances -cache-path=/jethro/cache -cache-size=0G -Dstorage.type=POSIX
Note that cache size is set to 0 on purpose.

The new instance is configured to listen on port 9111. - Start the Jethro service by running:
service jethro start

This will start both the Jethro Server and the Jethro maint. - Verify that you can connect to the Jethro server and run queriesRun the command:
JethroClient demo localhost:9111 -p jethro
In the command prompt run the query: show tables;
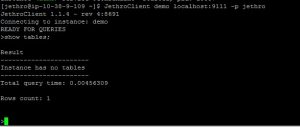
You now have a Jethro instance ready to load data and run queries.

